Supplies for Dry Cure Chamber**
*The atmospheric controller will take care of the temperature and the humidity. In this case, you won't need a hygrostat or temperature controller as this will double as both. We used both though, just to ensure they matched throughout the process.
**For directions on putting together your dry cure chamber, read our post, How to Convert a Refrigerator into a Curing Chamber
This is a running blog post on Dry Cured Elk Salami. The process involves stuffing the salami, incubating it, then drying it over the course of at least 18 days. Follow us on this charcuterie endeavor...
Preparation - Rinse Casings, Freeze Grinder Parts, & Cube Meat
If you are using natural casings, rinse them thoroughly, pouring water inside of them and allowing it flow all the way through the casing. Soak them in cold water while you prepare the meat. Collagen casings do not require any prep.
Keep your meat in the refrigerator and the fat in the freezer until right when you're ready to use them. Put the grinder head and tray of the meat grinder into your freezer while you cube the meat — you don't want the fat to melt into the meat. When you see salami at the market, the fat is distinct. Cut the meat and fatback into half inch pieces before grinding.

Grind Elk Meat & Fatback
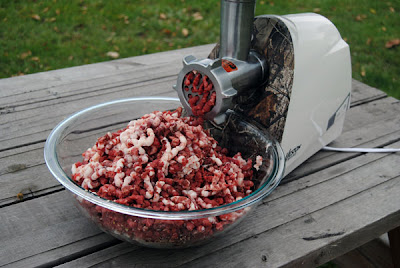
Remove your grinder head and tray from the freezer and assemble the grinder, then place the canister and desired diameter stuffing tube of your sausage stuffer into the freezer. Load the elk and fatback onto your grinder tray, sprinkle it with the kosher salt and pink cure salt, then begin grinding it through the coarse grinding plate of your meat grinder.
Mix
Once the meat is ground, dissolve the bactoferm completely in 1/4 cup of water. Mix the bactoferm solution and remaining ingredients into the meat by hand in a meat lug, or use a meat mixer.

Stuff
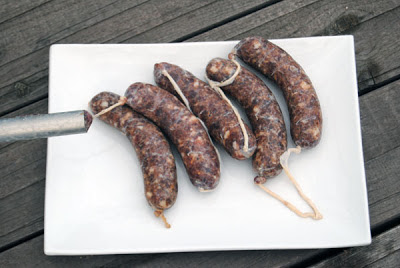
Remove the canister from the freezer and secure the stuffing tube of your desired diameter (We used a 33" tube). Fill the canister with the meat mixture and tightly pack it down into the canister. Secure the canister, and slowly turn the handle of the sausage stuffer to remove the air until the meat is just about to come out from the tube. Begin threading the casing over the stuffing tube. When you get to the end of the casing, tie the end tightly.
Begin turning the handle to fill the casing. Once you have reached your desired length for one link of salami, create a knot at the end of the meat. Leave a tail of around 6" of casing empty, then tie a second knot. Begin filling again, and repeat the process. You can, of course tie the salami any way you like, but this method is simple and will still allow the salami to dry properly.
Incubate
At this point, you need to incubate the sausages at 80 to 85 degrees F for at least 12 hours. To achieve this, we placed a small desk lamp with a 100 watt bulb into our 'curing chamber' and hung the sausages.
Dry
After incubating, weigh your sausages and be sure to record the weight. You will want to remove your sausages from the drying chamber after they have lost 30% of their weight. Ours were 3.25 lbs at this point, so after 12 days, we will weigh them to check on them, and around 18 days, we expect them to weigh around 2.3 lbs. If not, we'll allow them to continue to dry until they have reached that point. Larger diameter salami will, of course, take longer than 18 days.
